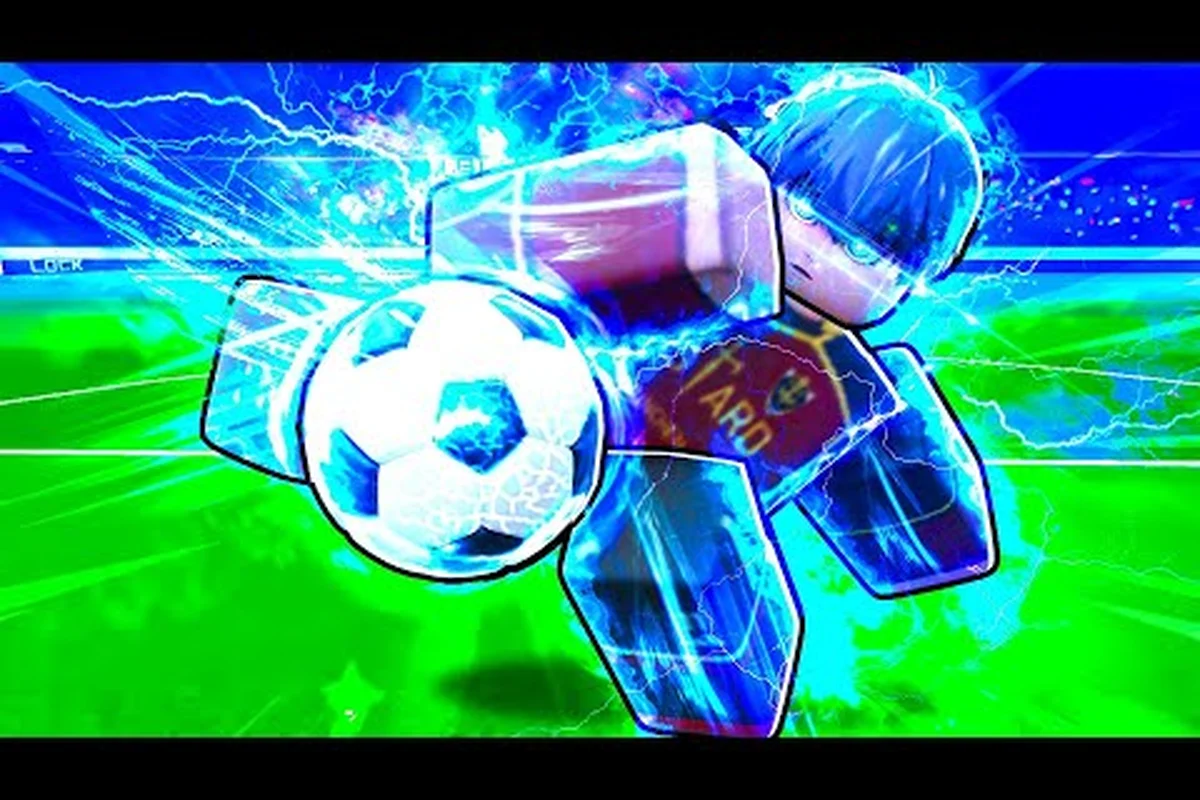
Blue Lock: Rivals is a fan-made 5v5 Roblox football game, so this blue lock rivals guide helps you start with useful match habits rather than guesswork. Learn the basics, choose a Style, and build your first attack with less trial and error.
Getting Started Setup
The official Blue Lock: Rivals page on Roblox (checked November 2026) identifies the experience as an unofficial fan tribute with 10-player matches, meaning five players face five players. Before your first match, learn the interface, choose a Style, and decide which basic actions you want to practice. That preparation matters because the scoreboard counts goals, so every possession directly affects the result.
Blue Lock: Rivals launched on July 26, 2024, and its official page is also the most useful source for current game information. The experience is run by the Blue Lock Rivals Unofficial Fans group rather than the anime’s rights holders or Kodansha. That distinction does not affect gameplay, but it is worth knowing when checking updates, community material, or the official game listing.
Your first ten-minute checklist
| Preparation step | What to do | Why it helps |
|---|---|---|
| Enter the experience | Open the official Roblox game page and join a server | Confirms you are using the current experience |
| Choose a Style | Review the available Styles before queueing | Your selection determines which abilities you can use |
| Learn basic movement | Practice running, turning, and changing direction | Improves control before the ball becomes contested |
| Practice ball actions | Use the pass, shoot, and tackle functions in a casual area | Helps you understand possession and contact |
| Review the HUD | Locate the score, possession cues, Flow indicator, and ability prompts | Helps you react instead of searching for information |
| Join a match | Start with a normal difficulty server | Keeps the early learning curve manageable |
Five-a-side spacing should be your first tactical idea. In a small football game, one abandoned flank can create a large gap, especially because the score depends entirely on goals rather than points, saves, or possession statistics. Keep your attention on the active player, the likely receiver, and the space behind the ball.
Choosing a Style without overthinking
A Style is selected before queueing, and that choice controls the abilities available during the match. Because exact Style abilities, damage values, cooldowns, and prices are not consistently documented outside the game, do not choose based on invented tier lists or exact statistics. Open the current selection screen, read the displayed descriptions, and choose the role you understand.
For a new player, the decision should be simple: pick a Style that supports the action you want to practice. If you enjoy carrying the ball forward, prioritize a role that feels comfortable in possession. If you prefer passing and positioning, choose the option whose tools match that style. You can learn more about the selection process in our Blue Lock: Rivals first-match walkthrough.
| Beginner priority | Style-selection question | Practical result |
|---|---|---|
| Learn passing | Can I comfortably support a teammate and receive a return pass? | Better first-pass accuracy and easier combinations |
| Learn shooting | Does the Style offer a shot action I can understand? | More practice with the final attacking moment |
| Learn tackling | Can I judge when to contest the ball without charging blindly? | Fewer mistimed challenges |
| Learn dribbling | Do I trust my movement with the ball at close range? | Better control during crowded attacks |
| Try everything | Is there a flexible option for experimenting? | A safer environment for testing basic mechanics |
Style commitment is permanent for that match, so use your first few rounds to identify what feels natural. Do not switch roles after one poor possession. A player who receives little of the ball may appear ineffective even when their positioning is sound, while a dribbler who loses possession frequently may simply be taking on too much risk.
Wiki Mechanics Overview
The official game page separates Flow from Awakening, and understanding that difference removes one of the most common early-game misunderstandings. Flow is an in-match state built through involvement, including completed passes, dribbles, and defensive actions. It behaves like a temporary window that sharpens touch and movement. Awakening is the Style-specific burst available during the match.
This distinction is crucial because Flow is not simply a permanent stat boost, and Awakening is not the same resource as Flow. Exact values and percentages are not documented in the available official material, so verify the current indicators in game rather than assuming a fixed duration or multiplier.
Flow, Awakening, and normal play
| System | What it is | How participation affects it | Beginner interpretation |
|---|---|---|---|
| Normal play | Standard passing, movement, shooting, and defending | Your regular decisions determine possession and field position | Build the attack before worrying about a burst |
| Flow | Temporary in-match state linked to involvement | Completed passes, dribbles, and defensive actions help build it | Treat it as a short window for sharper execution |
| Awakening | Limited Style-associated burst | Availability and effects depend on the selected Style | Save the decisive activation for a useful opening |
| Awakening Outfit | Cosmetic item listed by the official page | Does not define the core football objective | Do not confuse appearance with a gameplay advantage |
Flow participation rewards involvement across the field. A defender who wins a useful challenge or a midfielder who completes a pass may help build Flow even when the highlight belongs to someone else. This makes simple supporting actions worthwhile, especially when your team is finding space difficult.
Awakening timing
Do not activate Awakening merely because it is available. That instinct treats the ability like a reward rather than a football decision. A better approach is to identify the likely scoring moment first: a clear shot, a break into open space, a one-on-one situation, or a set structure that can produce a goal.
| Situation | Flow response | Awakening response |
|---|---|---|
| Ball near the opponent’s goal | Use sharper movement to support the attack | Consider activation only with a realistic scoring route |
| Ball near midfield | Build involvement through passing and movement | Save the burst unless an immediate advantage exists |
| Defensive transition | Help with the tackle and keep the shape | Preserve it unless it can prevent a clear chance |
| Team under pressure | Create a safe passing option | Avoid spending the burst on a low-percentage attempt |
| Open counterattack | Carry or pass with confidence | Activate when the route toward goal is clear |
Decisive-possession timing is the key beginner skill. A spectacular burst that produces no goal is less valuable than a well-timed activation on the possession that changes the scoreboard. This is also why chasing a style’s famous ability before understanding possession is not an effective route to improvement.
What the official page confirms
The official Blue Lock: Rivals Roblox page confirms the core format, including 5v5 matches, goals as the scoring method, pre-match Style selection, Flow, Awakening, and cosmetic Awakening Outfits. It does not provide a dependable public breakdown of every ability, exact cooldown, or damage figure, so avoid treating community speculation as verified balance information.
As of November 1, 2026, the official listing showed more than 5 billion total visits, approximately 6.3 million favorites, and roughly 10.2 million likes against about 358,000 dislikes. These figures show the experience’s scale, but they do not prove that one Style or tactic is stronger than another. Use them as context, not as a competitive recommendation.
How to Play the Core Actions
Learning the match means separating four actions: pass, shoot, tackle, and move with the ball. Each action has a different risk. Passing offers safety but can fail if the target is poorly timed; shooting creates value but ends the attack if it misses; tackling can recover possession but may leave your team exposed; dribbling preserves control but requires close-space movement.
Do not worry about complicated button combinations at the start. The available official information does not document specific keybind letters or a fixed input sequence, and controls can differ by device or experience. Learn the function first: pass, shoot, tackle, move, and use the selected Style’s available actions. The Blue Lock: Rivals training-drill overview can help turn those functions into deliberate practice.
Passing with purpose
A good pass starts before the ball reaches your feet. Look at the receiver’s movement, the space around them, and the next option after the pass. If a teammate is tightly marked, a square pass into their feet may be safer than a forward pass into a crowded lane.
| Pass situation | Better choice | Why |
|---|---|---|
| Teammate has clear space ahead | Send the ball into that space | Gives the receiver room to continue the attack |
| Teammate is surrounded | Use a short, safe pass | Reduces the chance of losing possession immediately |
| Opponent is closing from one side | Pass across the field | Uses the open side instead of feeding the pressure |
| Forward lane is blocked | Check for a lateral option | Maintains the attack without a risky turnover |
| You are under immediate pressure | Release the ball quickly | Waiting often reduces your available passing angles |
Support distance is the most useful passing concept for a beginner. Stand close enough to offer a clear return option, but not so close that your teammate cannot turn. In a five-a-side match, moving with the ball should not mean abandoning every passing lane around you.
Shooting and attacking the goal
A shot becomes more valuable when it comes from a position the goalkeeper must travel to meet. That does not require a documented shooting-power statistic; it is a football principle visible in the game. Move the ball into space, watch the defender’s position, and create a clear route toward goal before committing.
When the moment is poor, keep passing instead of forcing a shot. The scoreboard rewards goals, so volume does not matter unless it changes the result. A blocked shot can also leave the opponent with a counterattack, while a retained possession gives the team another opportunity to organize.
Tackling and defensive responsibility
A tackle is an attempt to win possession, not an automatic success. Approach the ball from an angle that reduces the opponent’s forward movement, make contact at the appropriate moment, and immediately check what happens next. Chasing from directly behind often allows the ball carrier to continue forward.
Defensive recovery matters after a failed challenge. One player diving into a tackle is not enough in 5v5. The nearby players must close passing lanes, recover their positions, and prevent a direct shot. If you cannot win the ball, force it toward the sideline or another less dangerous area.
Movement and spacing
Movement is not simply running toward the ball. A useful player gives the ball carrier multiple options, moves into open space, and avoids bunching around one attacker. Keep changing your angle if the direct path is blocked, but do not make unnecessary movements that leave your team exposed.
| Tactical situation | Movement choice | Result to seek |
|---|---|---|
| You have the ball | Move toward available space | Draw pressure away from a teammate |
| A teammate has the ball | Offer a short passing lane | Support possession without crowding |
| The ball is far away | Hold useful defensive position | Protect against a counterattack |
| Your opponent is near goal | Block the direct route to goal | Force a safer pass or shot |
| No one has the ball | Scan both sides before receiving | Enter the next possession with information |
Beginner Guide to Team Positioning
In a 5v5 game, positioning determines how many options your team has. If four players occupy the same small area, the ball may look safe but the next pass will have no target. Spread across the width, maintain recognizable roles, and keep one thought: where should the ball go next?
A useful beginner rule is to ask what the ball can do next rather than where you personally want to go. If the nearest teammate is under pressure, moving into a passing lane can help. If your team has clear possession, moving into open space stretches the defense. The Blue Lock: Rivals 5v5 positioning guide expands on team-shape principles for larger match situations.
Reading the match state
| Match state | Immediate team objective | Your useful contribution |
|---|---|---|
| Team has possession | Keep passing options open | Move into a clear lane |
| Opponent has possession | Reduce central space | Mark a passing route or goal path |
| Loose ball | Secure it quickly | Contest from a safe angle |
| Opponent is breaking forward | Recover toward goal | Delay the attack and protect the scoring route |
| Team is leading | Reduce unnecessary risk | Keep possession and clear outlets |
| Team is trailing | Create a higher-value chance | Push closer without abandoning support |
Attack direction should be checked when possession changes. A player who immediately runs toward the previous goal may be moving away from play. Take one quick look at the scoreboard or the ball’s direction, then move into a position that helps the team’s next action.
Supporting the ball carrier
Support should be active rather than stationary. Before receiving a pass, point your body toward the attacking space so the next touch can be controlled. If the pass is not coming, move again instead of waiting in a predictable area. Defenders benefit from predictable receivers because they can anticipate the next touch.
A simple support sequence helps the ball carrier maintain momentum: first read the closest defender’s pressure, then create a passing angle away from that player’s interception path. For example, if a fullback is stepping up to press, the wide teammate should drift toward the touchline and offer a short, stable target rather than making an obvious run beyond the ball. That movement can stretch the defensive line, force the ball carrier to turn safely, and reduce the chance of a wasteful pass or loss of possession.
-
Identify the ball carrier.
-
Check the nearest defender.
-
Move into the open passing angle.
-
Present a stable receiving target.
-
Change position after the pass is released.
-
Offer a new angle rather than standing still afterward.
Moving support keeps the team connected and makes it harder for opponents to mark everyone. The goal is not to receive every pass; it is to ensure the ball carrier has somewhere safe to move next. In Blue Lock: Rivals, this means breaking the defender’s pressure with a short support run, then giving the ball carrier a clear passing angle before the nearest opponent can close that space. For example, when a midfielder is pressed near the wing, a teammate can drift into the half-space, receive in stride, and reset the attack instead of forcing a risky pass toward the touchline. This is especially useful in a 4-2-3-1 buildup, where coordinated support can pull the defensive line sideways and create room for a controlled next action. Support should continue after the release of the pass: the supporting player needs to move again immediately, because standing still allows the marking defender to intercept the next progression or cut off the returning ball carrier.
Defending as a group
When your team loses possession, avoid everyone rushing toward the ball. The closest player can challenge, while the others protect central routes and the goal. If the challenge fails, the defensive shape should still reduce the opponent’s shooting options.
| Defensive principle | What it prevents | How to apply it |
|---|---|---|
| Protect the central route | A direct run through the middle | Keep a defender between the ball and goal |
| Force the ball outward | A close-range finish | Avoid conceding space straight ahead |
| Preserve a second defender | An immediate one-on-one | Let the first challenger recover if beaten |
| Watch passing lanes | A quick switch of play | Track the most dangerous receiver |
| Avoid unnecessary diving | A counterattack through vacated space | Challenge when the timing is reasonable |
Compact defense helps even without a goalkeeper-specific strategy. Players can switch to the player who receives the ball and help close the route toward goal. The point is not to chase constantly; it is to make the attacking direction predictable and difficult.
Guide to Style and Match Improvement
The fastest improvement comes from choosing a manageable objective for each match. A new player who tries to score several goals, master every Style, and learn every ability at once will struggle to identify what caused a loss. Pick one behavior—such as completing five passes or keeping possession through three phases—and judge the result afterward.
This blue lock rivals beginner guide focuses on decision-making rather than artificial difficulty. Learn one Style, sharpen two fundamentals, and watch how teammates respond. As you improve, add positioning, Flow timing, and Awakening decisions one layer at a time.
A practical three-match progression
| Match | Focus | Success measure | What to avoid |
|---|---|---|---|
| First match | Basic actions and spacing | Pass, shoot, and attempt controlled tackles | Chasing the ball from every position |
| Second match | One selected Style | Use its available actions in sensible situations | Saving every available burst |
| Third match | Flow involvement and team support | Create passes, carry, or defend while keeping shape | Ignoring a clear scoring opportunity |
| Fourth match | Full decision-making | Combine positioning, Flow, and timed Awakening | Repeating the same failed attack pattern |
One-match review keeps the learning process specific. After each round, write down one thing that worked, one mistake, and one adjustment. Examples include “my passes improved after I moved before receiving,” “I tackled too late,” or “we had no outlet on the right.” Concrete observations are more useful than vague conclusions such as “my positioning was bad.”
Choosing between safe and decisive play
A safe buildup relies on short passes, movement away from pressure, and clear outlets. A decisive attack tries to progress quickly through a forward pass, a dribble, or an immediate shot. Neither approach is inherently correct; the choice depends on the space and score state.
| Match condition | Better attacking approach | Reason |
|---|---|---|
| Opponent blocks the central route | Switch to the outside | Avoid feeding the strongest defensive area |
| Several teammates are open | Use a quick forward pass | Attack before the defense resets |
| Only one target is available | Play to that teammate | Build rather than lose possession |
| A clear shot appears | Shoot | The scoreboard rewards goals |
| Defenders are closing quickly | Take the shortest safe option | Preserve possession and support |
Controlled aggression means attacking decisively without abandoning your team’s structure. In Blue Lock: Rivals, the right choice preserves the useful match condition from the table: when defenders close quickly, the shortest safe option keeps possession; when several teammates are open, a quick forward pass exploits the space before the defense resets. A reckless action, such as forcing a central dribble into a blocked lane, can erase those outlets and let the opponent counter. A good aggressive action creates a shot, improves your numerical position, or forces a defensive mistake while teammates retain support.
Community guidance and verification
Community resources can reveal player impressions, but they should not replace official information. This community video testing every playstyle demonstrates that players regularly experiment with the roster, but its comments and conclusions remain dated personal opinion. The official developer community page is the better source for official announcements and updates.
Avoid copying conclusions from an old video without checking the current game. Style availability, balance, interface details, and community preferences may change. When a guide states an exact cooldown, damage value, drop rate, or price, verify it in the live experience before treating it as fact.
Progress without blaming teammates
Team results depend on several players, and a loss can create the urge to blame the final mistake. Instead, review the next best action you could have made. Did you have a passing option? Did you occupy a defender? Did your Awakening activate without a scoring route? This approach turns criticism into a useful plan.
Readable decision-making is the strongest beginner advantage. Good positioning makes your intention clear, reliable passing gives the team momentum, and disciplined Flow or Awakening timing prevents wasted momentum. The Blue Lock: Rivals beginner-mistakes guide can help identify repeated habits once your first matches reveal a pattern.
First-Match Mental Routine
A consistent routine reduces hesitation. You do not need to think through every movement during a fast match, but you should know what matters before the ball arrives: where teammates are, which direction you are attacking, whether Flow is active, and whether your Style’s Awakening has a useful opportunity.
Use the opening possessions to settle into the team’s rhythm. Complete a simple pass, move into space, and observe how your teammates respond. The early minutes are useful because opponents are still establishing shape, but they can also become chaotic if every player rushes toward the ball.
Pre-match checklist
-
Confirm the selected Style and review its available actions.
-
Check the server rules and match settings on the loading screen.
-
Identify the attacking direction once possession begins.
-
Locate the score, Flow state, and Awakening availability indicators.
-
Choose one initial role, such as support passer, wide runner, or defensive connector.
-
Accept that the first few touches may feel slow while you learn the interface.
| Routine stage | Mental prompt | Practical behavior |
|---|---|---|
| Before queueing | “Which Style can I use well?” | Choose based on displayed role and abilities |
| During possession | “Where is my next pass?” | Offer a clear, safe option |
| Without possession | “Which route should I protect?” | Mark a defender or goal path |
| With Flow active | “Can I improve this possession?” | Use sharper movement for a meaningful action |
| With Awakening ready | “Is this a scoring moment?” | Wait for a realistic chance |
| After the match | “What one thing changed?” | Keep one adjustment for the next round |
Match tempo should respond to the situation, not the clock. There is no documented rule requiring constant attacking. When the opponent has the ball, patience can create a safer counterattack; when your team has a numerical advantage, moving quickly may be better.
Learning from mistakes
Common mistakes include abandoning team shape, using a special ability without a purpose, and chasing a slow opponent into space. Another frequent issue is treating Flow as a permanent upgrade rather than a temporary window. These mistakes are easy to identify because they repeat.
| Mistake | Corrective thought | Next-match adjustment |
|---|---|---|
| Following every loose ball | “Am I needed near the danger zone?” | Challenge only when another teammate can cover |
| Forcing a shot | “Does this angle create a real chance?” | Pass when the route is crowded |
| Using Awakening too early | “What will the burst produce?” | Identify a scoring route first |
| Ignoring Flow | “Can this movement create a better option?” | Use the window for a decisive pass or carry |
| Standing beside the ball carrier | “Where can I help without blocking?” | Move into an open passing lane |
Calm correction beats rapid experimentation. Change one behavior at a time, because changing positioning, passing range, shot selection, and special timing simultaneously makes it difficult to know what improved. Two or three matches with the same adjustment usually provide a better signal than one chaotic game.
Frequently Asked Questions
Is Blue Lock: Rivals an official anime game?
Blue Lock: Rivals is a fan-made Roblox experience created by the Blue Lock Rivals Unofficial Fans group. Its official Roblox page explicitly identifies it as an unofficial tribute and says it is not endorsed by the anime’s IP owners or Kodansha. This means it can offer recognizable football and character-themed gameplay while remaining independent from the official licensed anime ecosystem.
How many players are in a Blue Lock: Rivals match?
Each server supports 10 players, organized as a five-a-side match. The scoreboard counts goals, so attacking and defensive decisions should focus on creating or preventing a scoring chance. Because the pitch is relatively compact, keeping width available and avoiding unnecessary clustering can make a measurable difference without requiring advanced statistics.
Should beginners use Flow or Awakening immediately?
Build involvement first because completed passes, dribbles, and defensive actions can contribute to Flow. Treat Flow as a temporary window for sharper execution, not a permanent upgrade. Awakening is a limited Style-associated burst, so save it for a possession with a realistic scoring route instead of activating it whenever the indicator appears.
What is the best Style for a new player in Blue Lock: Rivals?
There is no verified universal best Style, and exact ability details can change or remain undocumented outside the game. Choose the option whose displayed role and actions match a skill you already understand, such as passing, shooting, dribbling, or tackling. Play several matches with that Style before judging it, then review positioning and decision-making rather than blaming the selection alone.
Can a beginner win by scoring one goal?
Yes, because the scoreboard counts goals without requiring a larger scoring margin. A single goal can secure the result, but scoring remains dependent on creating a genuine chance through passing, movement, and shot selection. Defensive positioning still matters because conceding at the wrong moment can undo the work your team did to build that advantage.